1. 화면에 놓일 오브젝트를 모두 나열한다.
2. 오브젝트를 움직일 수 있는 컨트롤러 스크립트를 정한다.
3. 오브젝트를 자동으로 생성할 수 있도록 제너레이터 스크립트를 정한다.
4. UI를 갱신할 수 있도록 감독 스크립트를 준비한다.
1. 화면에 놓일 오브젝트를 모두 나열한다.

2. 오브젝트를 움직일 수 있는 컨트롤러 스크립트를 정한다.
>> player 와 bomb
2.1 player를 애니메이션으로 만든다.


2.2 키를 조작해 플레이어 움직이기
> BoyController script 생성
using System.Collections;
using System.Collections.Generic;
using UnityEngine;

public class BoyController : MonoBehaviour
{
    // Start is called before the first frame update
    void Start()
    {

    }

    // Update is called once per frame
    void Update()
    {
        if(Input.GetKeyDown(KeyCode.LeftArrow))
        {
            transform.Translate(-3, 0, 0);
        }

        if(Input.GetKeyDown(KeyCode.RightArrow))
        {
            transform.Translate(3, 0, 0);
        }

    }
}
위 코드는 x축 중심으로 3씩 움직여서 어색함, 움직임 조절
using System.Collections;
using System.Collections.Generic;
using UnityEngine;

public class BoyController : MonoBehaviour
{
    public float speed = 1;

    bool flipFlag = false;
    bool leftFlag = false;

    float vx = 0;
    float vy = 0;

    // Start is called before the first frame update
    void Start()
    {
    }

    // Update is called once per frame
    void Update()
    {
        Vector3 pos = Camera.main.WorldToViewportPoint(transform.position);

        if (pos.x < 0f) pos.x = 0f;
        if (pos.x > 1f) pos.x = 1f;
        if (pos.y < 0f) pos.y = 0f;
        if (pos.y > 1f) pos.y = 1f;

        transform.position = Camera.main.ViewportToWorldPoint(pos);

        vx = 0;
        vy = 0;
        if(Input.GetKey("right"))
        {
            Debug.Log("right clicked");
            vx = speed;
            leftFlag = false;
        }
        if(Input.GetKey("left"))
        {
            Debug.Log("left clicked");
            vx = -speed;
            leftFlag = true;
        }
        /*if(Input.GetKey("up"))
        {
            Debug.Log("up clicked");
            vy = speed;
            //leftFlag = false;
        }
        if(Input.GetKey("down"))
        {
            Debug.Log("down clicked");
            vy = -speed;
            //leftFlag = false;
        }*/
    }

    void FixedUpdate()  //1초에 50번씩 실행됨
    {
        this.transform.Translate(vx/50, vy/50, 0);

        this.GetComponent<SpriteRenderer>().flipX = leftFlag;   //왼쪽 오른쪽 방향을 바꾼다.
    }
}

2.3 bomb controller 생성
using System.Collections;
using System.Collections.Generic;
using UnityEngine;

public class BombController : MonoBehaviour
{
    public float speed = 1;
    // Start is called before the first frame update
    void Start()
    {

    }

    // Update is called once per frame
    void Update()
    {
        //FPS 환경에 따른 보정을 위해 Time.deltaTime 적용
        transform.Translate(0, speed *-0.1f * Time.deltaTime, 0);

        //화면 밖으로 나오면 오브젝트를 소면시킨다.
        if(transform.position.y < -6.0f)
        {
            Destroy(gameObject);
        }
    }
}
2.4 충돌 판정
간단한 충돌 판정 알고리즘
> 오브젝트의 형상을 단순하게 원형이라고 가정하고, 오브젝트 사이의 거리가 두 오브젝트의 반지름을 합한 것보다 작게 되면 충돌한 것으로 간주함.
using System.Collections;
using System.Collections.Generic;
using UnityEngine;

public class BombController : MonoBehaviour
{
    public float speed = 20;

    GameObject boy;

    // Start is called before the first frame update
    void Start()
    {
        this.boy = GameObject.Find("boy");
    }

    // Update is called once per frame
    void Update()
    {
        //FPS 환경에 따른 보정을 위해 Time.deltaTime 적용
        transform.Translate(0, speed *-0.1f * Time.deltaTime, 0);

        //화면 밖으로 나오면 오브젝트를 소면시킨다.
        if(transform.position.y < -6.0f)
        {
            Destroy(gameObject);
        }

        //충돌 판정
        Vector2 p1 = transform.position;    //bomb 중심 좌표
        Vector2 p2 = this.boy.transform.position;
        Vector2 dir = p1 - p2;

        float distance = dir.magnitude;

        //반경
        float r_bomb = 0.2f;
        float r_boy = 0.5f;

        if(distance < r_bomb + r_boy) {  //충돌
            Destroy(gameObject);
        }
    }
}
3. 오브젝트를 자동으로 생성할 수 있도록 제너레이터 스크립트를 정한다.
폭탄 오브젝트를 1초에 한 개씩 만드는 Generator를 만든다.
같은 오브젝트를 많이 만들고 싶을 때 주로 프리팹을 사용한다.
3.1 프리팹 만들기
쓰고 싶은 오브젝트를 Hierarchy 창에서 Project 창으로 드래그 & 드롭

Project 창의 bomb 을 bombPrefab 으로 이름 변경하고, 씬에 배치한 오브젝트는 더 이상 필요가 없으므로 delete 한다.
3.2 Generator 스크립트 작성
using System.Collections;
using System.Collections.Generic;
using UnityEngine;

public class BombGenerator : MonoBehaviour
{
    public GameObject bombPrefab;
    float span = 1.0f;  //1초
    float delta = 0;

    // Update is called once per frame
    void Update()
    {
        this.delta += Time.deltaTime;
        if(this.delta > this.span) {
            this.delta = 0;
            GameObject bomb = Instantiate(bombPrefab) as GameObject;
            int locX = Random.Range(-6, 7);
            bomb.transform.position = new Vector3(locX, 6, 0);
        }

    }
}
3.3 Empty object에 Generator 스크립트 적용한뒤, BombGenerator 로 이름 변경

3.4 Generator 스크립트에 프리팹 전달하기
스크립트 내의 변수에 오브젝트 실체를 연결


4. UI를 갱신할 수 있도록 감독 스크립트를 준비한다.
4.1 image를 추가
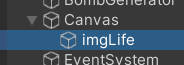
4.2 Anchor Point 설정

HP 이미지를 줄여 나간다.
UI 오브젝트의 Image에서 제공하는 Fill 기능을 사용한다. Fill Amount 변수 값(1.0에서 시작)을 바꾸면 이미지 표시 영역을 줄이거나 늘릴 수 있다. 이미지를 잘라내는 방법 말고도 Fill Method를 상하 방향(Horizontal), 좌우 방향(Vertical), 선형(Radial) 으로 바꿔 가며 만들 수도 있다.

여기서 하트 모양을 수직으로 설정해서 Fill amount를 1에서 0.5로 줄여보면 다음과 같이 나타난다.

4.3 GameDirector 작성
UI 를 갱신하는 감독 오브젝트를 만든다.
using System.Collections;
using System.Collections.Generic;
using UnityEngine;
using UnityEngine.UI;   //UI를 사용하므로 꼭 추가해야 한다.

public class GameDirector : MonoBehaviour
{
    GameObject hpGauge;
    float curAmount;

    // Start is called before the first frame update
    void Start()
    {
        hpGauge = GameObject.Find("hpGauge");
        curAmount = 1.0f;
    }

    public void decreaseHP() {
        this.hpGauge.GetComponent<Image>().fillAmount -= 0.2f;
        curAmount -= 0.2f;
        if(curAmount == 0) {
            Debug.Log("Game over");
            //TODO : Scene 전환
        }
    }

    public void increaseHP() {
        if(curAmount < 1.0f) {
            this.hpGauge.GetComponent<Image>().fillAmount += 0.2f;
            curAmount += 0.2f;
        }
    }
}
빈 프로젝트를 만든뒤, 생성한 GameDirector 스크립트를 드래그&드롭한다.
bomb이 충돌했을 때, hp가 줄어드는 decreaseHP() 를 호출해야 한다.

버튼 만들기
지금까지 키 이벤트로 처리했기 때문에 스마트폰에서 실행하려면 버튼 동작이 되어야 한다.
1. Hierarchy 에서 UI -> Button 선택
아래와 같이 앵커 포인트로 좌/우에 각각 설정하고, 이미지를 넣어준다.

버튼을 눌렀을 때 플레이어를 이동시키는 메서드를 작성해야 한다. BoyController.cs 에 아래 메서드를 추가한다.
public void LeftButtonDown() {
    vx = -speed;
    leftFlag = true;
}

public void RightButtonDown() {
    vx = speed;
    leftFlag = false;
}
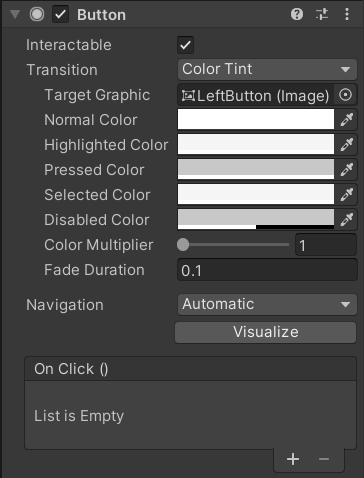
메서드를 생성했으니, 이제 버튼 클릭시 해당 메서드가 불리게 끔 맵핑을 해줘야 한다.
Hierarchy 창에서 생성한 Button을 선택하고, Inspector 창의 Button(Script)항목에서 OnClick() 의 + 를 클릭한다. 그리고 Hierarchy 창에서 BoyController 스크립트가 지정된 boy object를 None(Object)로 드래그&드롭한다.


Scene 전환
위에서 생성한 Scene은 GameScene.unity 로 저장하고,,
새로운 Scene을 생성한 뒤, GameOverScene이라 이름을 변경한다.
Scene의 배경을 넣은 다음, 화면 전환을 할 스크립트를 작성한다.

스크립트를 작성한다. LoadScene 을 위해 SceneManagement 패키지를 import 해야 한다.
using System.Collections;
using System.Collections.Generic;
using UnityEngine;
using UnityEngine.SceneManagement;  //LoadScene 을 사용하는 데 필요

public class ClearDirector : MonoBehaviour
{
    // Update is called once per frame
    void Update()
    {
        if(Input.GetMouseButtonDown(0)) {
            SceneManager.LoadScene("GameScene");
        }
    }
}
빈 오브젝트를 생성해 해당 스크립트를 넣는다.
실행을 해 보면 Scene 전환을 위해 어느 Scene을 어떤 순서로 사용할 지 Unity에 등록을 해야 한다.
Scene 등록
Build Setting 을 선택, Scenes In Build 영역으로 Scene 들을 드래그&드롭한다.

게임을 실제 플레이할 때는 0번 Scene 부터 시작한다.

GameDirector.cs 에 Scene 전환을 위한 아래 코드를 추가한다.
'Unity' 카테고리의 다른 글
| 유니티 #6 - Time.deltaTime (0) | 2022.06.04 |
|---|---|
| 유니티 #5 - 화면 회전 고정 (0) | 2022.06.03 |
| 유니티 #3 - C# Script (0) | 2022.06.01 |
| 유니티 #2 <Rigidbody, Collider> (0) | 2022.05.30 |
| 유니티 #1 <배경, 캐릭터, 애니메이션, CS 스크립트 적용> (0) | 2022.05.29 |